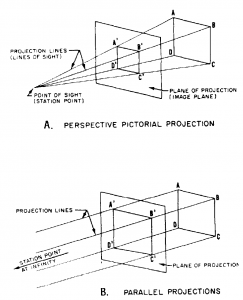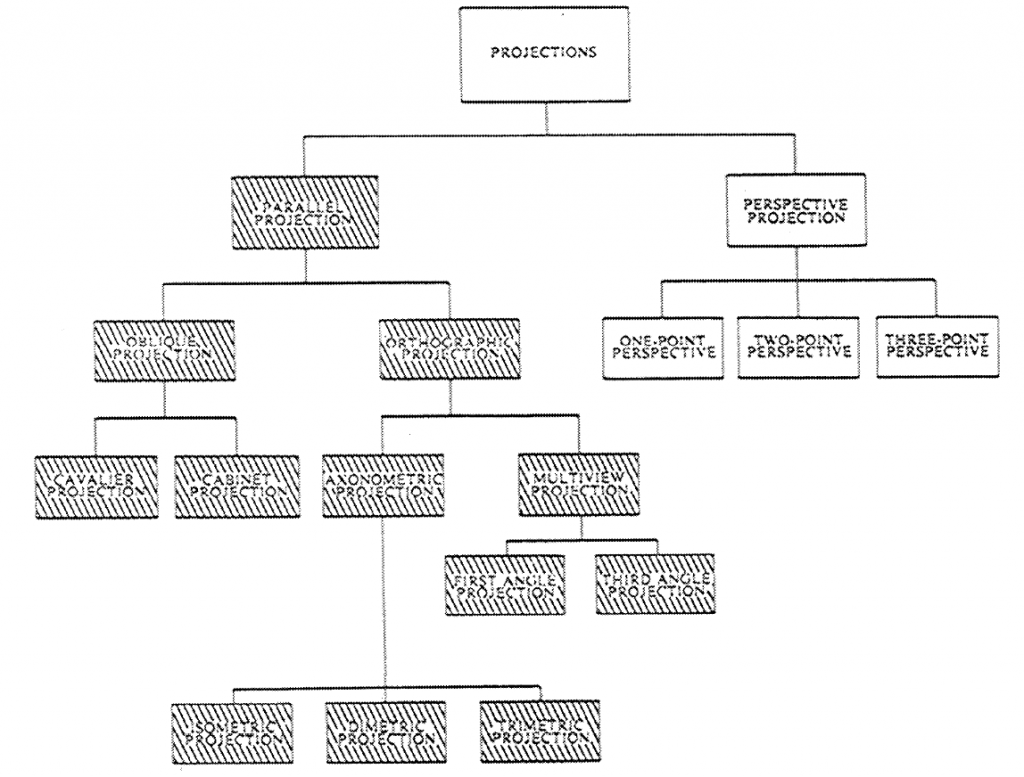
To satisfy requirements for preparing single or multi-view drawings, you may use two main types of projection: PARALLEL and PERSPECTIVE (fig. 5-1). PARALLEL projection (fig. 5-2) is further classified into subtypes according to the direction of its projection lines relative to the plane of projection. If the projection lines, in addition to being parallel to each other, are perpendicular (normal) to the plane of projection, the result is an orthographic projection. If they are parallel to each other but
oblique to the plane of projection, the result is an oblique projection. To better understand the theory of projection, you must become familiar with certain elements that are common to each type of projection. Some of these elements are defined below.
The POINT OF SIGHT (or STATION POINT) is the position of the observer in relation to the object and the plane of projection (fig. 5-2). It is from this point that the view of the object is taken. The point of sight is changed to give different views of the same object; hence, there must be a different point of sight for each view. Imagine yourself looking first at the front of an object, then down at the top, and then at the right or left side, as the case may be. Each additional view requires a new point of sight. The observer views the features of the object through an imaginary PLANE OF PROJECTION
(or IMAGE PLANE). In parallel projection, this theoretical transparent plane is placed between the point of sight and the object, as shown in figure 5-2. For perspective pictorials, it is normally placed between the point of sight and the object. For the purpose of studying any type of projection, it must be assumed that the planes of projection are in fixed positions. Once the
object is placed in a definite imagined position, it should never be changed. If a different view of the object is desired, the location of the point of sight is changed. The PROJECTION LINES (or LINES OF SIGHT) are the imaginary lines from the eye of the viewer (point of sight) to points on the object (fig. 5-2). By the use of projection lines, points on the object are projected on the image plane. These points are the points at which the projection lines appear to pierce the image plane. By the projection of the prominent points, lines, and surfaces of an object, a complete view of that object can be projected on the plane of projection. The relationship between the point of sight (station point), the plane of projection (image plane), the projection lines (lines of sight), and the manner in which they are used for each individual type of projection will be discussed in the following sections.

