Homework
Brake rotor – Cast and Machined
Turn in one file. Your machined casting is LASTNAME_13.prt. It should reference the casting file below.

Lecture
Brake rotor example (from NX10 help)
The rotor is cast and then machined. Each step has separate part number and part drawing, but one is made from the other.
First workflow:
NOTE: This is the workflow you used with the minibke left and right frame sides.
- Create cast part as a prt.
- Create an assembly and add cast part as a component
- Create a new file inside the assembly to be the machined part
- Use wave geometry linker to create a linked body of the casting
- In wave, turn off “fix at current timestamp”
- Add the machined features to the lined body.
- Issues:
- Makes it difficult to manage revisions of each part
- Easier to understand.
- parts are peers in an assembly
- Can make the cast part first then subtract or
- Can make machined part first and add
Alternative Workflow
Note: You will use this workflow for this assignment.
- Create cast part as a part
- Create an assembly file that will be the machined part.
- Add the cast part to the machined part
- Remove parts to be machined
- Issues:
- Only two files to maintain
- Cast part and machined parts versions are always coordinated
- Casting is a part in the bill of materials of the machined part
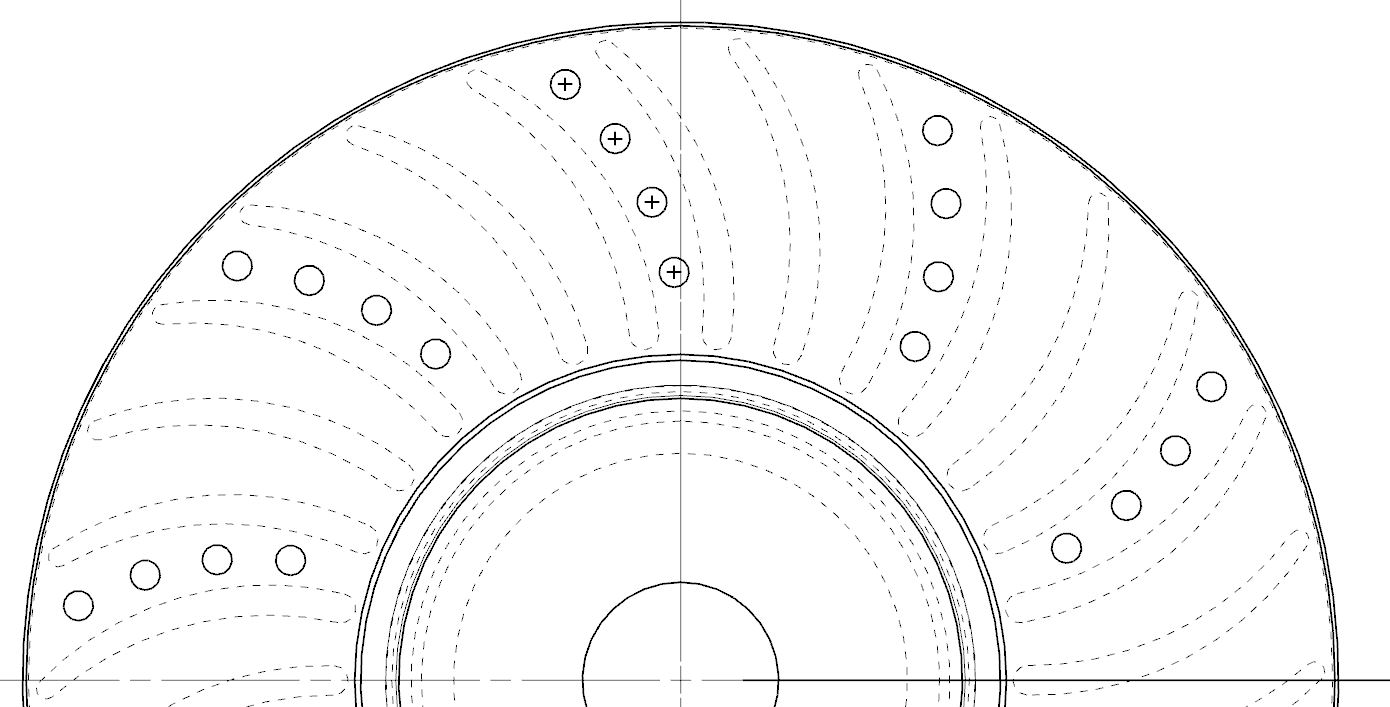
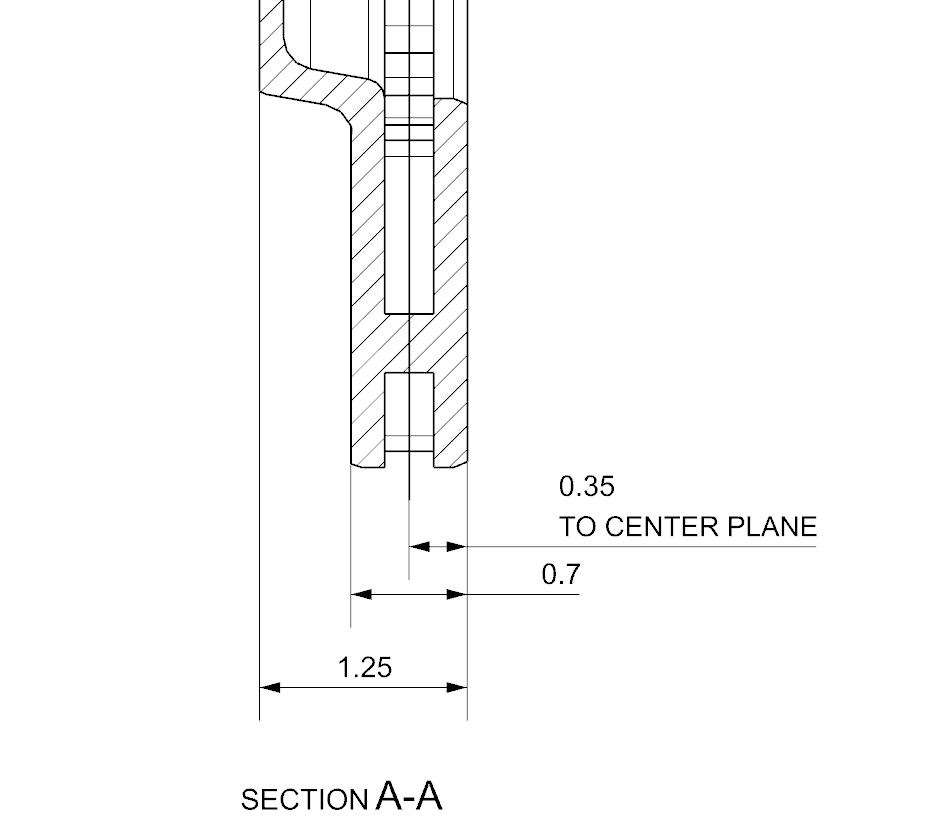
Machine the casting to the dimensions shown below:
Also, add a series of .18 diameter holes through the casting that do not intersect the internal fins. 4 holes per set, 10 sets equally spaced.