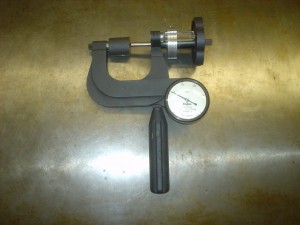
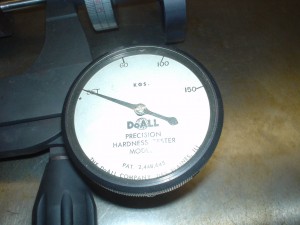
Use the Ames hardness tester to determine the hardness of the annealed steel specimen. Take a minimum of three readings. Report your findings in the standard lab report format.
The tester should not take excessive force to read, but sometime the dial gets stuck. If the major load is not easily “dialed in,” see the instructor. Do not use excessive force on the reader or it will be ruined.
REFERENCE ONLY
| For Use With Ames Style Standard Hardness Testers | ||||||||||||
| SCALE | Major Load(kg) | Penetrator Type | Dial Color | Use Barrel | Typical Materials | |||||||
| A | 60 | C Diamond | Black | C | Extremely hard materials, Tungsten Carbide thin steel and low hardened steel | |||||||
| B | 100 | 1/16 Ball | Red | B | Medium hard materials, Low and medium Carbon steels, brass, aluminum Alloys, malleable iron, etc. | |||||||
| C | 150 | C Diamond | Black | C | Hardened steels, hardened and tempered alloys, hard cast iron, pearlitic malleable iron, titanium, and other materials harder than B100 | |||||||
| D | 100 | C Diamond | Black | C | Medium case hardened steel, thin steel, and pearlitic malleable iron | |||||||
| E | 100 | 1/8 Ball | Red | B | Cast iron, Aluminum and magnesium alloy bearing metals | |||||||
| F | 60 | 1/16 Ball | Red | B | Annealed brass and copper alloys, thin soft sheet metals | |||||||
| G | 150 | 1/16 Ball | Red | B | Beryllum copper, phosphor bronze, malleable irons, etc. | |||||||
| H | 60 | 1/8 Ball | Red | B | Aluminum sheet, zinc, lead | |||||||
| K | 150 | 1/8 Ball | Red | B | Cast iron, aluminum alloys, bearing materials | |||||||
| L | 60 | 1/4 Ball | Red | B | Plastics and soft metals such as lead, thin materials | |||||||
| M | 100 | 1/4 Ball | Red | B | Same as L scale | |||||||
| P | 150 | 1/4 Ball | Red | B | Same as L scale | |||||||
| R | 60 | 1/2 Ball | Red | B | Same as L scale | |||||||
| S | 100 | 1/2 Ball | Red | B | Same as L scale | |||||||
| V | 150 | 1/2 Ball | Red | B | Same as L scale | |||||||


