Filenames (inch models)
- Assembly: LASTNAME_HW10A
- Right: LASTNAME_HW10B
- Left: LASTNAME_HW10C
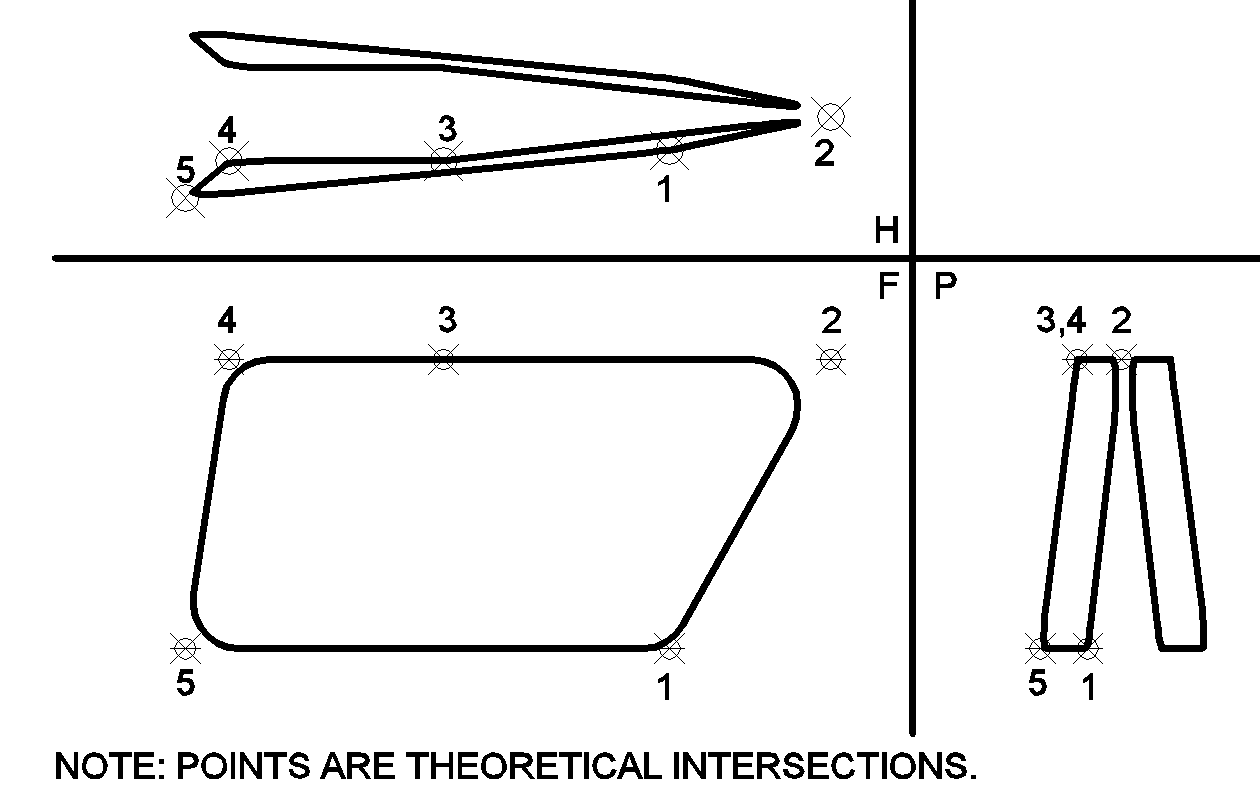
Frame Points – Rider’s Right Side
| Point | Radius | x | y | z |
| 1 | 2.5 | 22.865 | -1.936 | -15.5 |
| 2 | 2.5 | 31.5 | -0.135 | 0 |
| 3 | 2.5 | 10.75 | -2.5 | 0 |
| 4 | 2.5 | -0.75 | -2.5 | 0 |
| 5 | 2.5 | -3.098 | -4.48 | -15.5 |
Note: Frame seam is 7.0 inches before the start of the first bend.
To make the right side frame:
- First create points 1 through 5.
- Connect with line curves
- Fillet with arc curves
- Menu -> Insert -> Curves -> Lines and Arcs
- Then use Arc (tan-tan-radius)
- Use tube command
- Insert -> Sweep -> Tube
- IMPORTANT: From pulldown, select Tangent Curves – Follow Fillet

- Note: It is a good idea to group the curves into a single group.
To make the left side frame:
- Create a parent assembly that will become the frame assembly.
- Go to the assembly and create a new component (just an empty part).
- This will become the left. Give it the name of the left side.
- Stay in the assembly, but make the new part you just created (left side) the “work part.”
- Insert -> Associative Copy -> Wave Geometry Linker
- Set type to “mirror body”
- Make sure “fix at current timestamp order” is off.
Fork tube